I thought it would be fun to create a whistle. I have made quite a few over the years, but I have given most of them away as gifts. I have three left to glaze and fire, so the pictures I have added are bisque fired whistles.
 |
| Bisque loon whistle |
 |
| Bisque wolf whistle |
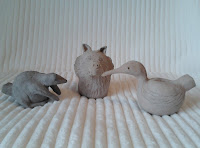 |
| Trio of bisque whistles |
You only need a small amount of clay to produce a whistle, a ball about the size of a lemon will do.
Slice it off of your block, wedge it, and then shape it into a ball. Take your slicing wire and slice the ball in half so that you have two equal halves to work on. Cover one half with plastic to keep it pliable for later, and scoop out the centre area of the other half. I find that a melon baller works well, but be sure to leave about a 1/4 inch of clay left on the outside wall. If you hold the outside cupped in your hand as you scoop. it should hold its shape as you work on it. Save all of the scooped out bits in a plastic baggie to use later to create whatever creature you plan to make. I will try to make a bird whistle with my ball of clay.
Now that you have finished scooping, smooth out the inside chamber with you fingers. Don't add water, or it will get floppy.
Complete the other half in the same way, scooping out and then smoothing the inside chamber.
Let it dry out a bit if it is too wet, and when firm, score the rims of each half with a pic tool or small knife trying to scratch in a checkerboard pattern. Add slurry to both rims and attach the two halves back together, lining up the rims to form your ball again.


Now you have the basic whistle with the inside chamber. The bigger the chamber...the lower the note (voice of the whistle) will be.
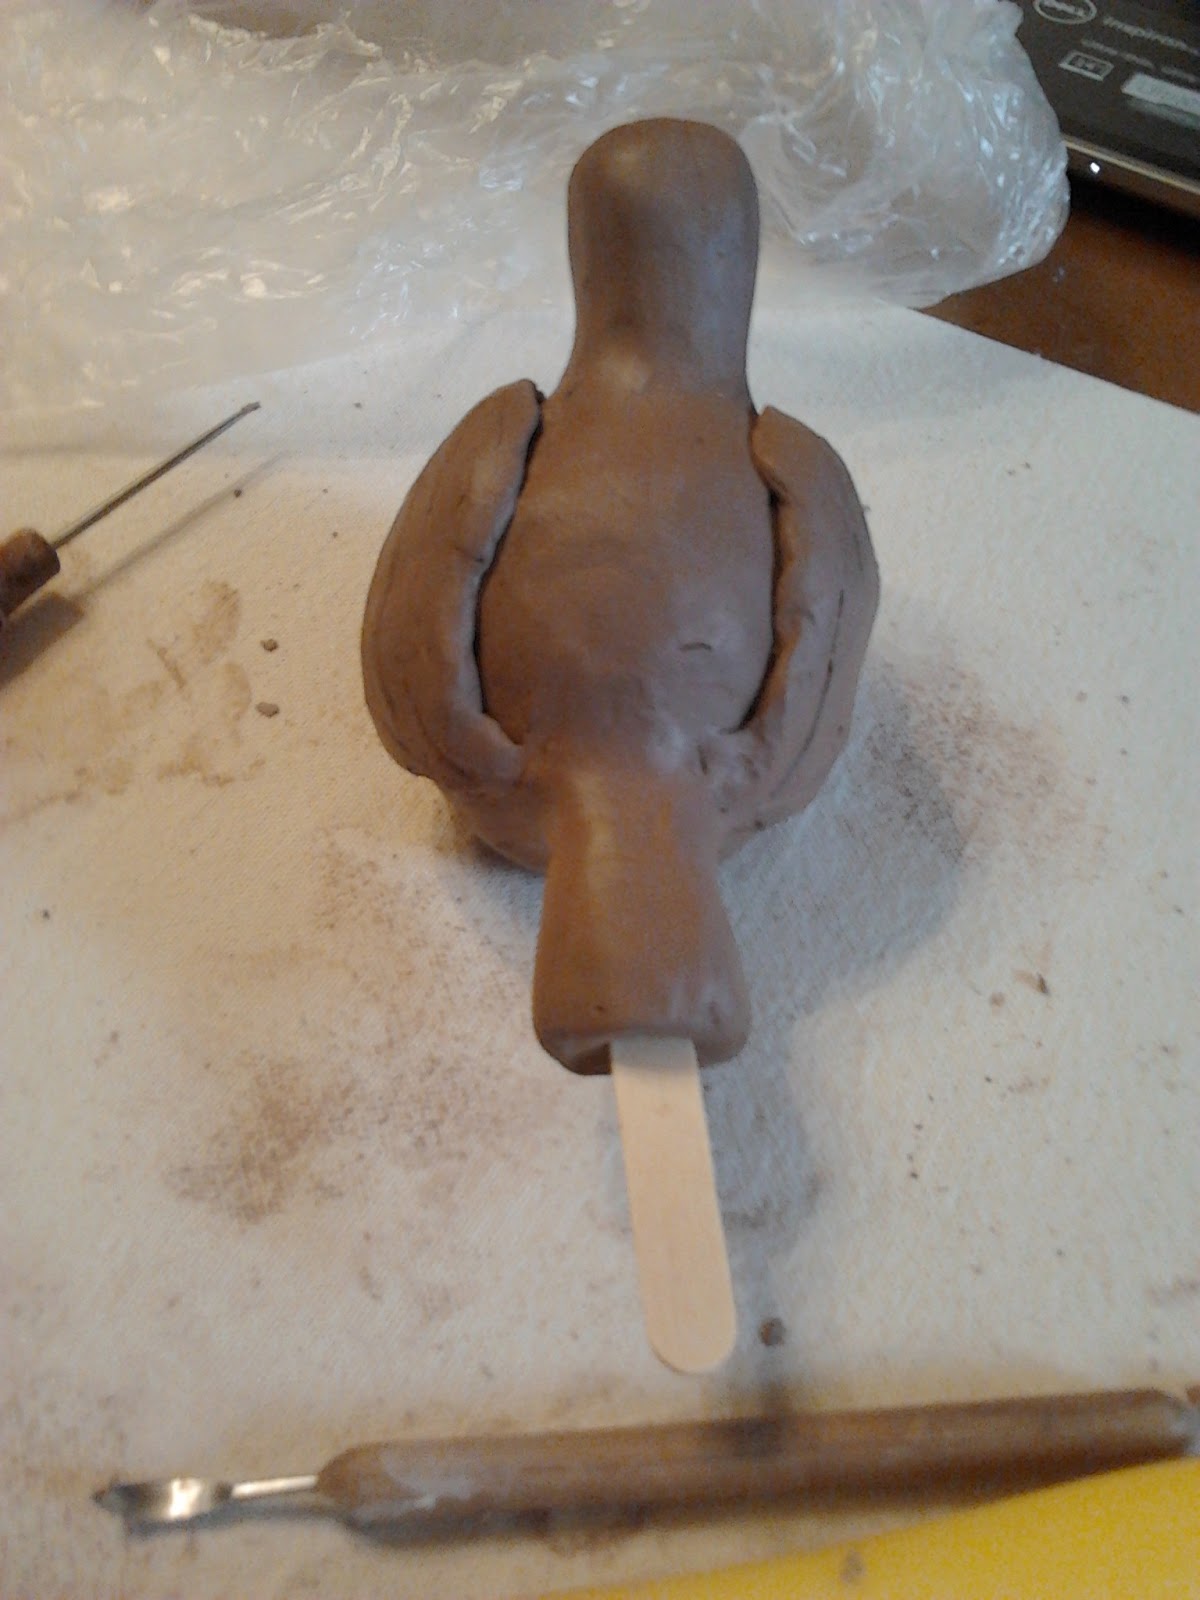 Set the basic whistle aside to firm up and decide on your creature. For a bird like mine, you will need a small oval for the head, two flattened wing shapes for the sides, and a flattened wedge shape to make the tail. The tail also serves as the mouthpiece. Score all of your forms that you are going to attach, add slurry, and score and slurry the place of attachment on the whistle. Press on firmly and smooth out the seams. You can add more detail later. Once the tail is attached, find a popsicle stick or a nail file to create the mouthpiece opening. Push the popsicle stick (nail file) up into the tail piece and straight in to the chamber (you will feel that it is hollow). Push in about half way into the chamber and leave it there (see photo right).
Take your pin tool and make a hole straight down into the chamber about 1/2 inch in from the base of the tail. You will feel the pin tool hit the popsicle stick or file. Carefully make the hole bigger with the pin tool as you discard the peeled away clay. Make the hole about the size of a pencil end.
Use a regular pencil (no attached eraser) and put the pencil down into the hole. Bend the pencil firmly toward the head of the bird on a 45 degree angle, and with firm pressure, drag the pencil out of the hole to create a bevel. This creates the whistle sound when you blow in the mouth piece. Take out the popsicle stick or file and try your whistle. If there is any sticky clay in your mouthpiece, it may not whistle properly. You may have to reinsert your stick or file to dislodge any sticky bits. Don't get discouraged if your creation doesn't sing right away. I have had a few that caused heartache, but eventually I was able to produce a good sound. I trimmed the tail and added details so it would resemble a bird, (photo below), and you can see the bevel hole in the bottom photo.
Voila!...I have a mourning dove.

As soon as I figure out wave files, I'll upload this little guy's voice so you can hear it. Maybe we should try a turtle ocarina next time,
See you then.


No comments:
Post a Comment